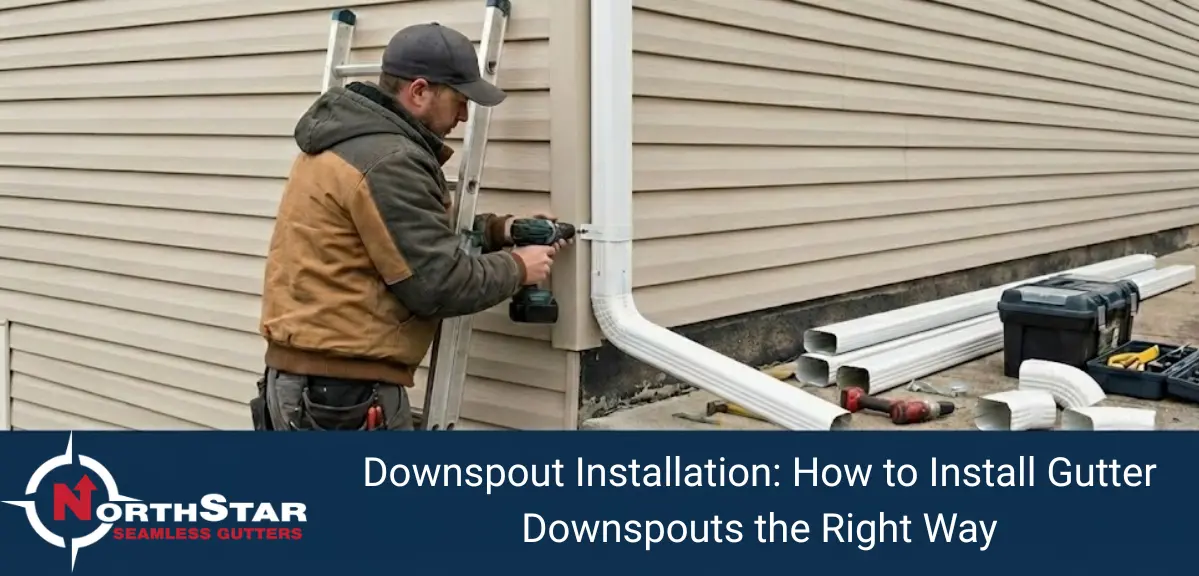
The attachment of the downspout, the last part of any gutter system, is the final step to ensuring water is directed away from your home’s foundation to avoid expensive structural issues. A downspout system of your gutters, when installed correctly, will also keep your basement dry, and your soil and home’s foundation protected from erosion and cracks that could potentially cost you over $10,000 in repairs.
Quick Answer / TLDR
Downspout installation means that you attach pipe downspouts to the outside of your home to redirect water from gutters to the ground, with a minimum of one downspout every 30-40 feet. This involves measuring gutter outlets, cutting downspouts to fit, fastening them into place with brackets every 6-8 feet, and attaching extensions to guide water away from your foundation for 4-6 feet. Basic tools and a regular homeowner will get the job done in 2-4 hours per downspout.
Understanding Downspout Systems
A downspout is a vertical pipe running along the outside of a home that directs water from the gutters down to the ground. A dysfunctional downspout will cause the water to overflow right at the base of your foundation, which can cause foundation cracks (a $2,000 – $15,000 repair), basement flooding, soil erosion, and rotting wood in your siding.
Common Downspout Types
Rectangular Downspouts (2×3 or 3×4 inches) Most popular for residential applications. The 2×3 can cover up to 600 square feet of roof, while the 3×4 can cover up to 1,200 square feet..
Round Downspouts (3 or 4 inches) Retro design for historic homes, same capacity water flow, requires special round elbows and brackets..
Material Options Aluminum (3-6 ft) is lightweight and rust-proof. Vinyl is anywhere from $2-4/ft and it’s cheap but brittle in cold. Copper (15-30 ft) has a shelf life of more than 50 years and offers a premium look. Steel ($5-8/ft) is the most durable, but you’ll need to protect it from rust.
Tools and Materials Required
Essential Tools
- Measuring tape (25-foot)
- Tin snips or hacksaw
- Power drill with 1/8-inch bit
- Rivet gun or self-tapping screws
- Level (2-foot minimum)
- Crimping tool
- Ladder rated for your weight plus 50 pounds
Materials per Downspout
- Downspout sections (10-foot standard)
- Drop outlet
- Elbows (2-3 typically)
- Downspout brackets (one per 6-8 feet)
- Screws or rivets
- Splash block or extension
- Sealant for connections
How to Install Gutter Downspout: Step-by-Step Guide
Step 1: Plan Downspout Placement
Place the downspouts at 30 to 40 feet intervals along the gutter run. Ideal locations are corners, at ground level 4-6 feet away from the foundation, and will not face windows or walkways.
Code Requirements: Most cities require one downspout for every 40 feet of gutter, although for heavy rain areas regulation may be as much as 30 feet.
Step 2: Install the Drop Outlet
The drop outlet connects your gutter to the downspout:
- Mark outlet location on gutter bottom
- Cut hole using tin snips matching outlet size
- Apply sealant around hole perimeter
- Insert outlet from inside gutter
- Secure with 4-6 rivets or screws
- Add sealant on underside
Critical: Verify gutters slope 1/4 inch per 10 feet toward the outlet before cutting.
Step 3: Create the Wall Offset
Most homes require an offset in order to bring the downspout flush to the wall.:
- Attach first elbow to outlet (crimped end up)
- Measure overhang distance minus 2 inches for clearance
- Cut short connector piece to span offset
- Attach second elbow to redirect downspout vertically
- Test-fit before securing
Step 4: Cut and Assemble Downspout Sections
Measure from top elbow to ground, subtracting 6 inches for bottom elbow:
- Mark downspout with permanent marker
- Cut straight across with tin snips
- File cut edges smooth
- Crimp top end if connecting sections
Pro Tip: Cut aluminum with finished side up to prevent scratching. Use a fine-tooth saw for vinyl to avoid cracking.
Step 5: Install Brackets
Space brackets properly to prevent wind damage:
- First bracket: 12 inches below top elbow
- Middle brackets: Every 6-8 feet
- Last bracket: 12 inches above ground
Attachment by Siding Type:
- Vinyl: Use mounting blocks—never screw directly through vinyl
- Wood: Pre-drill 1/8-inch holes, use 2-inch screws into studs
- Brick: Use masonry anchors with 2-inch screws
- Metal: Self-tapping screws with rubber washers
Step 6: Secure Downspout
Slide downspout through brackets from top to bottom:
- Insert top section in upper bracket
- Add next section with crimped end inserted into previous
- Secure each connection with screws or rivets on both sides
- Continue to bottom bracket
Always work top to bottom—installing from bottom up causes misalignment 80% of the time.
Step 7: Install Bottom Extension
Direct water away from foundation:
- Attach 90-degree elbow to bottom section
- Add extension piece (minimum 4 feet)
- Position onto splash block
- Ensure discharge slopes away from house
Drainage Standard: Water must flow 4-6 feet from foundation minimum. Clay soil or poor drainage areas require 10-foot extensions or underground drainage.
Installing Gutter Downspout on Different Materials
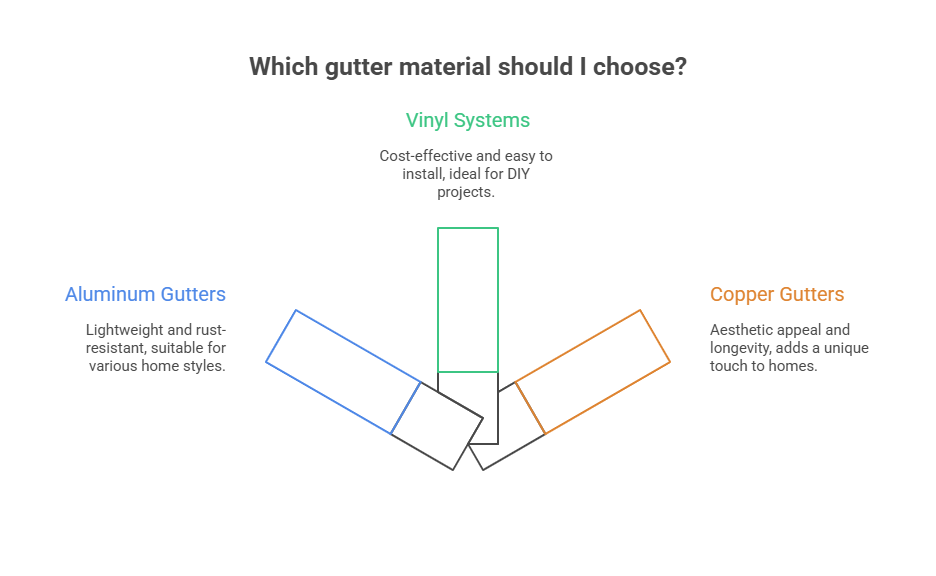
Aluminum Gutters
Use an aluminum-compatible sealant and match the colors of the downspouts. Anticipate a life span of 20-30 years with good installation.
Vinyl Systems
Feature Snap‑in outlets, no answers in sealant needed. Not for retrofitting into existing walls. May be more likely to crack under 0°F.
Copper Gutters
Need to solder outlets with torch and flux. Only copper or stainless fasteners should be used. Form a natural attractive patina after 5-10 years with life expectancy over 50 years.
Rain Gutter Downspout Installation: Sizing for Your Roof
Calculating Required Capacity
Formula: Downspouts Needed = Roof Area ÷ Drainage Capacity per Downspout
Standard capacities:
- 2×3 downspout: 600 sq ft roof area
- 3×4 downspout: 1,200 sq ft roof area
Example: A 1,500 sq ft home has roughly 750 sq ft roof area per side. Each side requires 750 ÷ 600 = 1.25, rounded up to 2 downspouts per side (4 total minimum).
High-Rainfall Adjustment: Areas receiving 40 or more inches of rainfall per year should reduce their coverage by 25% (two-three handle spirals cover 450 sq ft, not 600).
Common Installation Mistakes to Avoid
Mistake 1: Inadequate Foundation Clearance Downspouts that end 3 feet out are great for water penetration and foundation issues. Always extend at least 4 feet, 6 feet is better.
Mistake 2: Insufficient Brackets Spacing greater than 10 feet apart results in damage from the wind. Maximum spacing 8 feet; 6 feet in areas subject to high winds. Not being able to firmly attach the downspouts cause 40-percent of the claims for storm damage.
Mistake 3: Wrong Fasteners Screws made of steel into aluminum are a source of galvanic corrosion. Use fastener material that matches the downspout or stainless steel.
Mistake 4: Ignoring Slope Water gets pooled when gutters are leveled. Keep a 1/4 inch per 10 feet slope toward each downspout.
Mistake 5: No Ground Drainage Terminating at grade without splash blocks leads to erosion. Install splash blocks, subsurface drainage, or pop-up emitters.
Advanced Techniques
Underground Drainage Connection
For permanent water management:
- Dig trench 10+ feet from house, sloped 1/8 inch per foot
- Install 4-inch corrugated or PVC pipe
- Connect downspout with underground adapter
- Discharge to dry well, rain garden, or approved storm sewer
Code Check: Some municipalities prohibit storm sewer connections—verify local requirements before starting.
Rain Barrel Integration
- Install diverter valve 12 inches above barrel height
- Connect overflow hose back to downspout
- Add mosquito screen to inlet
- Elevate barrel 12-18 inches for water pressure
- Install shut-off valve for winter
Capacity Note: A 1,000 sq ft roof produces ~600 gallons per inch of rainfall.
Cost Analysis
DIY Installation
- Materials per downspout: $85-175
- Typical home (4 downspouts): $340-700
- Tool investment (if needed): $75-150
Professional Installation
- Labor per downspout: $75-200
- Complete install (4 downspouts): $600-1,400
- Copper premium: $1,500-3,500
- Underground drainage: $500-1,200 per downspout
Savings: DIY saves $400-900 on labor but requires 6-8 hours work time.
Maintenance Schedule
Twice-Annual (Spring and Fall)
- Remove debris from outlets
- Flush downspouts with garden hose
- Check bracket security
- Inspect for damage or rust
- Verify extensions in place
Annual Tasks
- Apply rust-inhibiting paint to steel
- Replace worn sealant
- Tighten loose fasteners
- Check ground settling
Testing New Installation
Before first major rainfall:
- Run garden hose at full pressure into gutter for 5 minutes
- Check all connections for leaks
- Verify water flows freely through downspout
- Confirm discharge directs water away from foundation
- Inspect all brackets
Flow Test: Properly sized downspouts handle 3-5 gallons per minute without backup.
Conclusion
A correct downspout installation keeps your home’s foundation safe from water damage that can lead to thousands of dollars in repairs. From precise positioning and firm attachment to adequate drainage extension, these actions result in a stable system that safely directs water away from your building. No matter if you option to install them yourself or have a professional do it, knowing what you are getting into will help your gutter system work for you for years and years. The most important things are good gutters that are the right size for your roof area, solid bracket support every 6-8 feet, and having your discharge points at least 4-6 feet from your foundation on a proper slope.
Frequently Asked Questions About Downspout & Gutter Installation
1. How much does it cost to install a downspout?
The average cost to install a downspout ranges between $150 and $350 per downspout.
Cost breakdown:
- Materials: $40–$120
- Labor: $80–$200
- Extensions or underground drains: +$50–$150
Factors that affect cost:
- Height of the home (single vs multi-story)
- Material (aluminum, copper, steel)
- Number of elbows and extensions
- Wall surface (brick costs more)
2. How should gutter downspouts be installed?
Gutter downspouts should be installed using this standard process:
- Attach a gutter outlet at the low point of the gutter
- Connect elbows from gutter to wall
- Install vertical downspout sections from top to bottom
- Secure with straps every 6–8 feet
- Seal all joints and fasteners
- Extend discharge 5–10 feet away from the foundation
Correct installation ensures proper drainage and prevents foundation damage.
3. Do roofers install downspouts?
Yes, many roofing contractors install downspouts, but not all specialize in gutter systems.
Typically:
- Roofing companies install downspouts during roof replacement
- Gutter contractors offer more precise drainage planning
- Some roofers subcontract gutter work
Best practice:
For drainage performance, a gutter specialist is usually the better choice.
4. How much does it cost to put gutters on a 1,500 sq ft house?
Installing gutters on a 1,500 sq ft home typically costs between $900 and $2,400.
Estimated costs by material:
- Aluminum: $6–$10 per linear foot
- Steel: $9–$14 per linear foot
- Copper: $18–$30 per linear foot
Most homes of this size require 120–160 linear feet of gutters and 3–5 downspouts.
5. How to install gutters yourself for beginners?
For beginners, DIY gutter installation follows these steps:
- Measure roofline and plan slope (¼ inch per 10 feet)
- Install fascia brackets every 24–36 inches
- Attach gutter sections securely
- Install end caps and seal seams
- Cut outlet holes and attach downspouts
- Test with water before final fastening
Beginner tip:
DIY installation works best on single-story homes with aluminum gutters.
6. How are downspouts attached to gutters?
Downspouts are attached to gutters using:
- A gutter outlet installed in the gutter base
- Two elbows to transition from gutter to wall
- Screws or rivets to secure connections
- Exterior-grade sealant at all joints
The downspout always overlaps top section inside bottom section to prevent leaks.
7. What is the rule of thumb for downspouts?
The general rule of thumb for downspouts is:
- 1 downspout for every 30–40 feet of gutter
- Downspout size: 2×3 inches for standard homes
- Discharge distance: minimum 5 feet from foundation
- Bracket spacing: every 6–8 feet
Following this rule prevents overflow and water pooling.
Tagged: gutter-installation-in-eau-claire, gutter-installation-in-chippewa-falls, gutter-installation-in-fall-creek, gutter-installation-in-bloomer, gutter-installation-in-hudson-city,
Also read : gutter-installation-eau-claire, right-gutter-service-company-northstar, how-to-use-half-round-gutters,. do-leaf-guards-really-work-heres-what-you-need-to-know, how-rainwater-harvesting-helps-fight-urban-water-shortages,leafguard-gutters-cost, half-round-copper-gutters-guide-2026, k-style-gutters-complete-guide